The Northern Belle

  • Blog
  • About
  • Contact

Winnie Pinnie - Seashore Style

7/26/2016

4 Comments

 
Picture
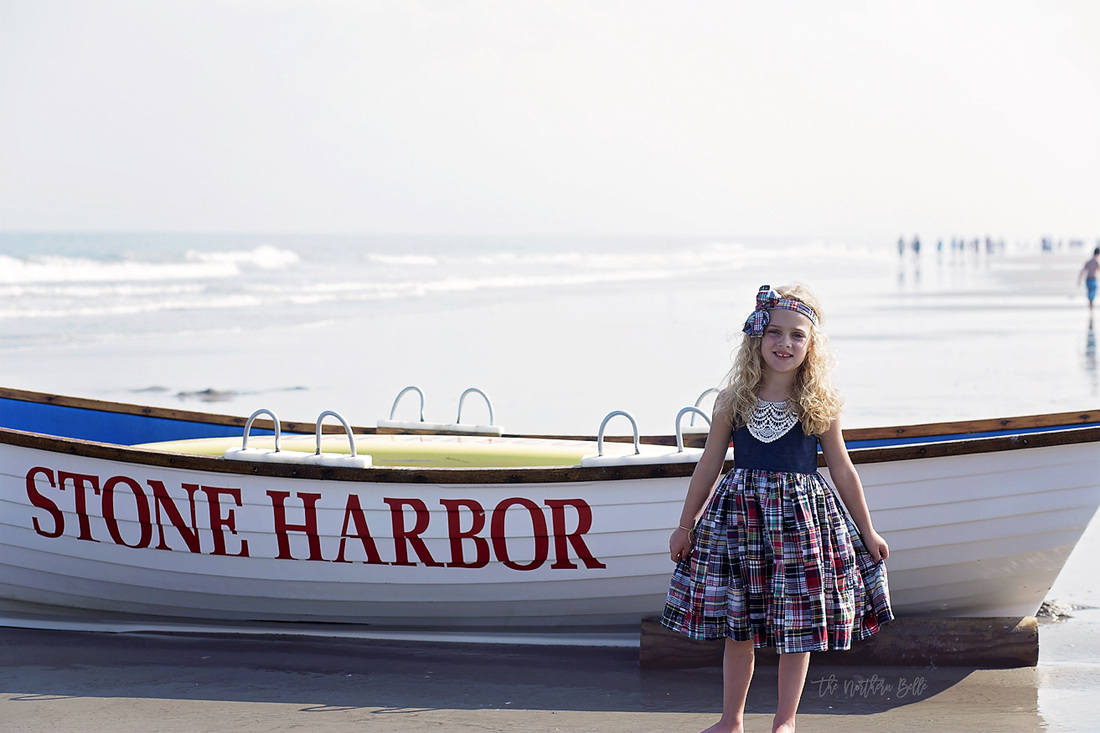
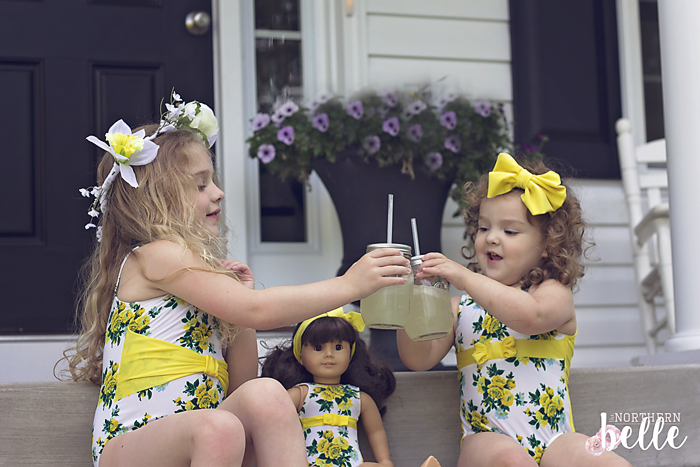
Ahoy there!!  Welcome to my stop on the Little Lizard King Winnie Pinnie Blog Tour!!  I brought Winnie along on vacation last week to beautiful Stone Harbor, New Jersey.  It is one of my favorite places to visit and I knew Winnie would be a hit in this perfectly preppy little beach town.
Picture
Let's talk about the pattern!
Options include:
  • Size 12 months - 8 yr
  • Simple Skirt- top length
  • Simple Skirt- dress length
  • Bias Skirt- dress length

Pattern features:
  • 36-pages of tutorial instruction
  • Printable PDF pattern- easy to assemble
  • Colored photos
  • Glossary of sewing terms used
  • Beautiful tester photos for inspiration

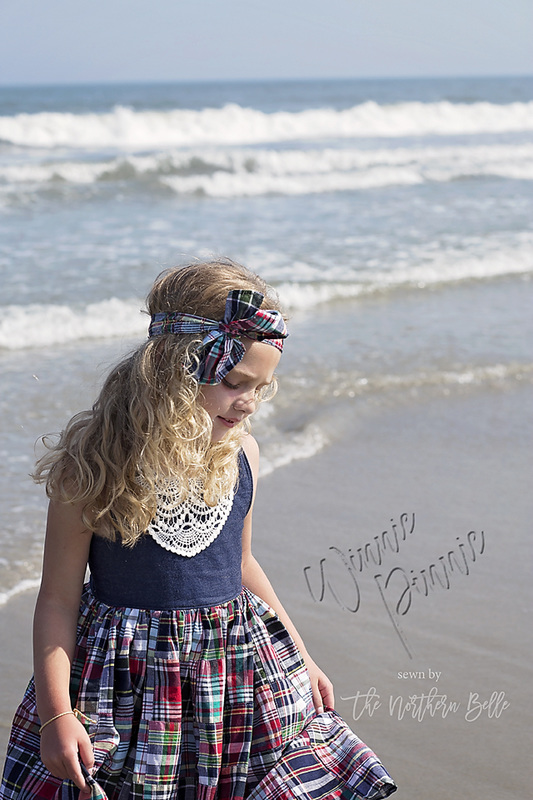
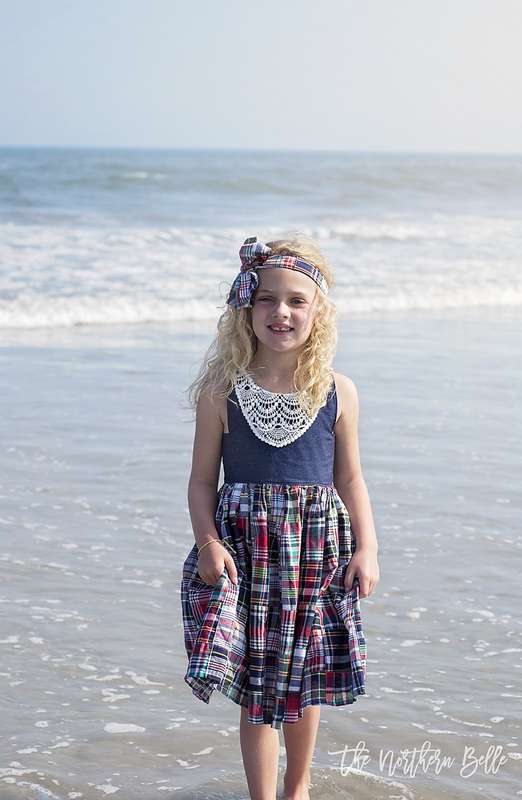
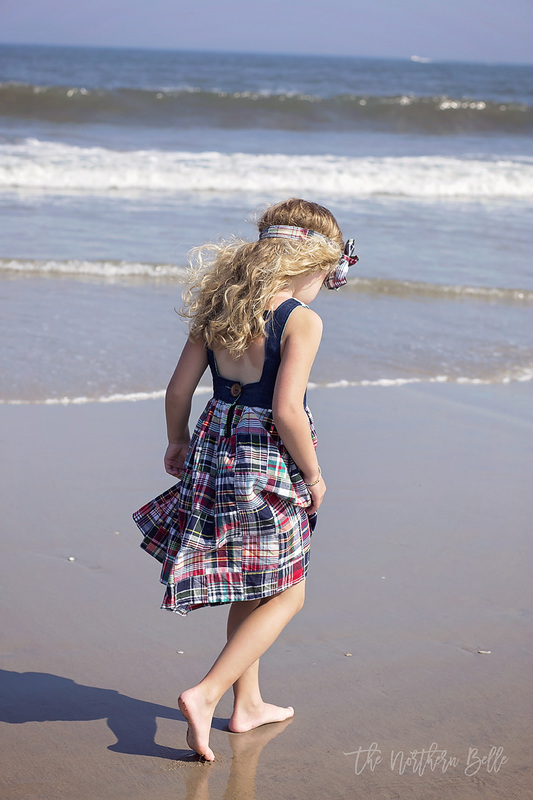
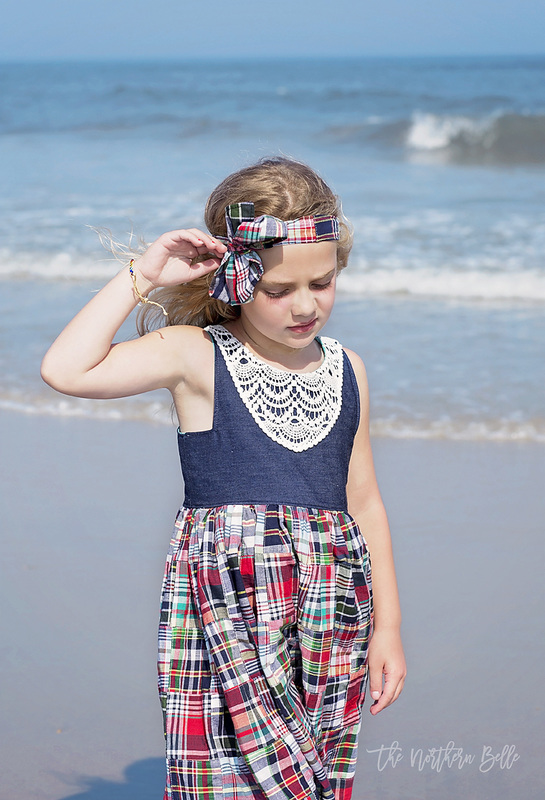
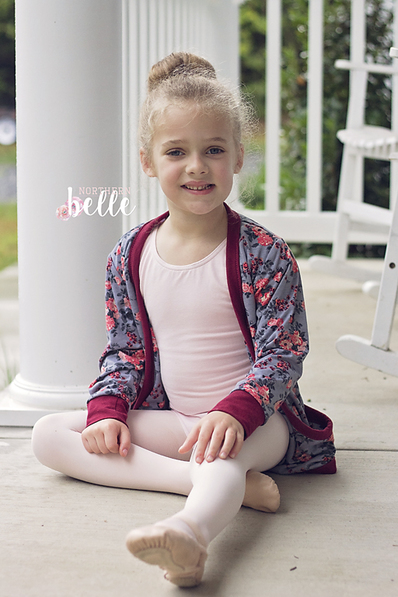
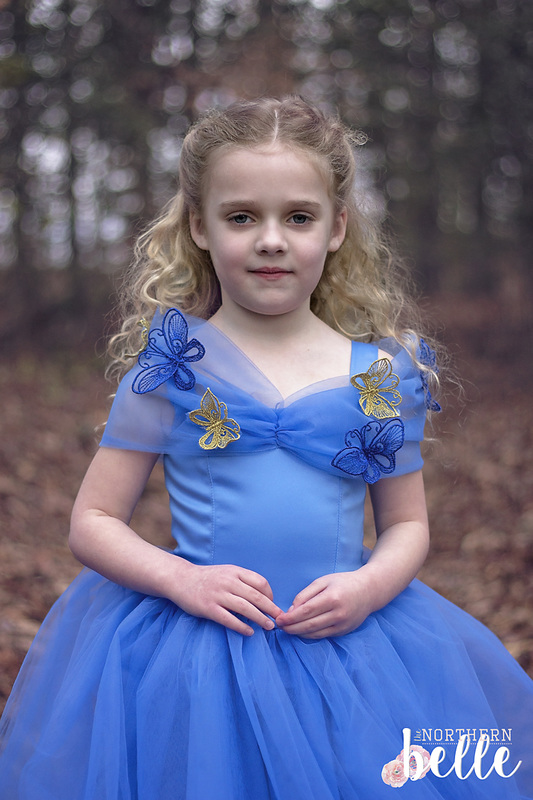
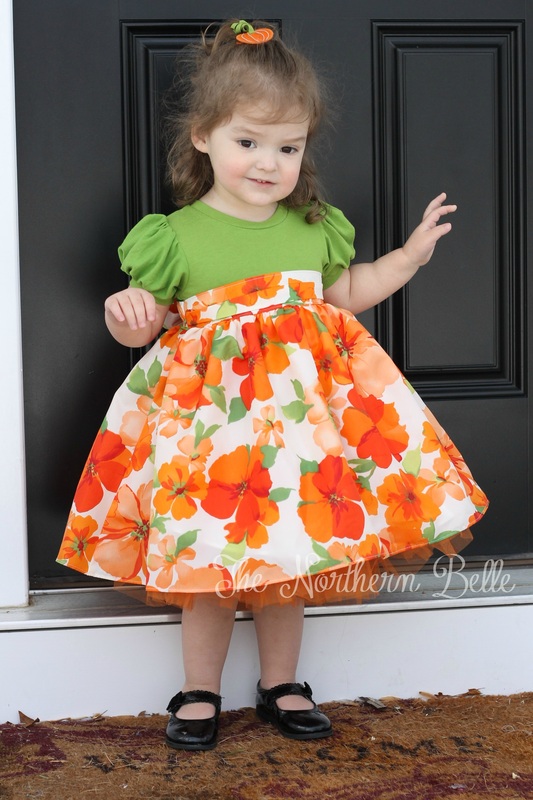
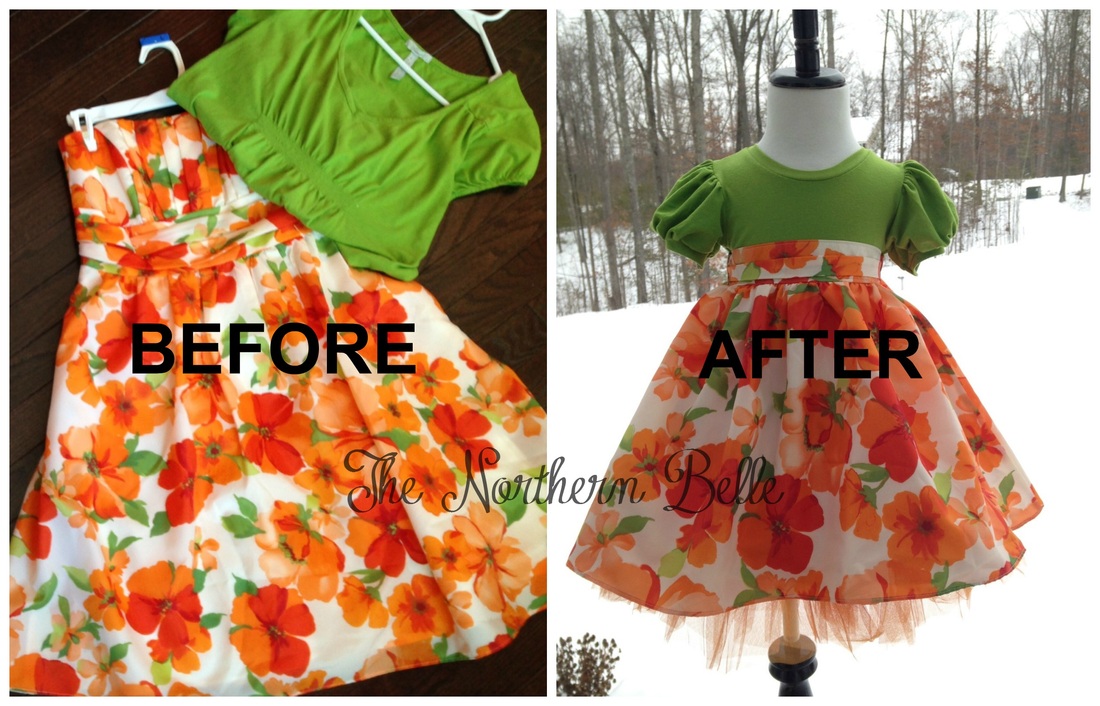
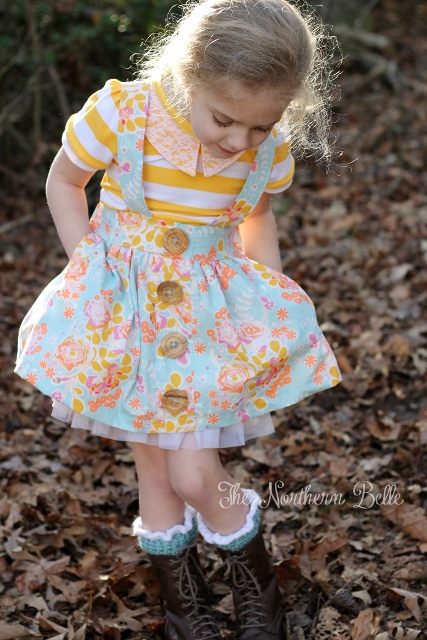
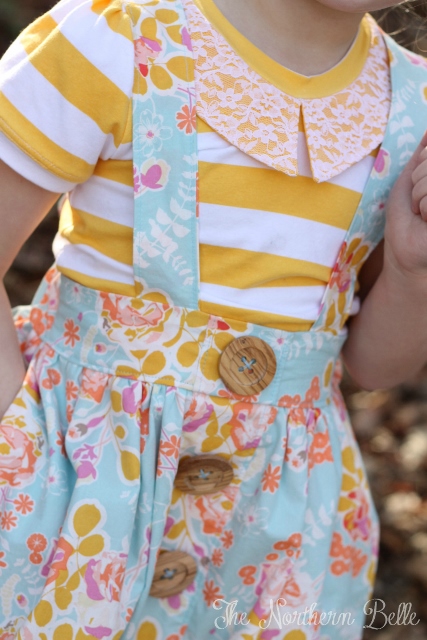
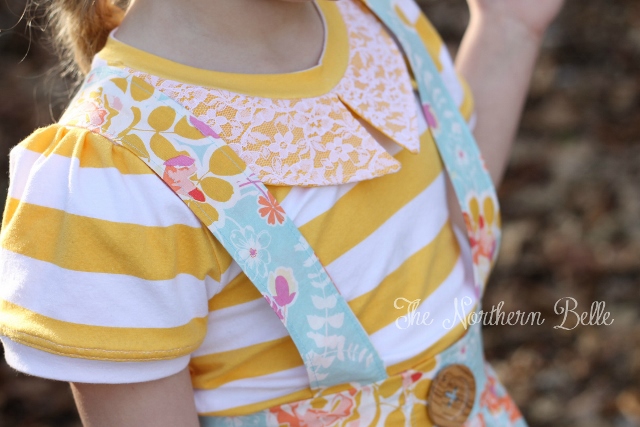
I made the simple skirt in dress length version. I used a beautiful madras print from Hobby Lobby (purchased earlier this Spring) and a light-weight denim from Joann's for the bodice.  ​I decided to cut up a women's tank top applique to embellish the front bodice.  The applique is from Sincerely Rylee fabric shop and I simply laid it on top of my cut bodice to see how long I wanted the "bib".  Pinned it in place and then cut off the excess around my bodice.  The applique is sandwiched between the bodice and bodice lining.
Picture
Picture
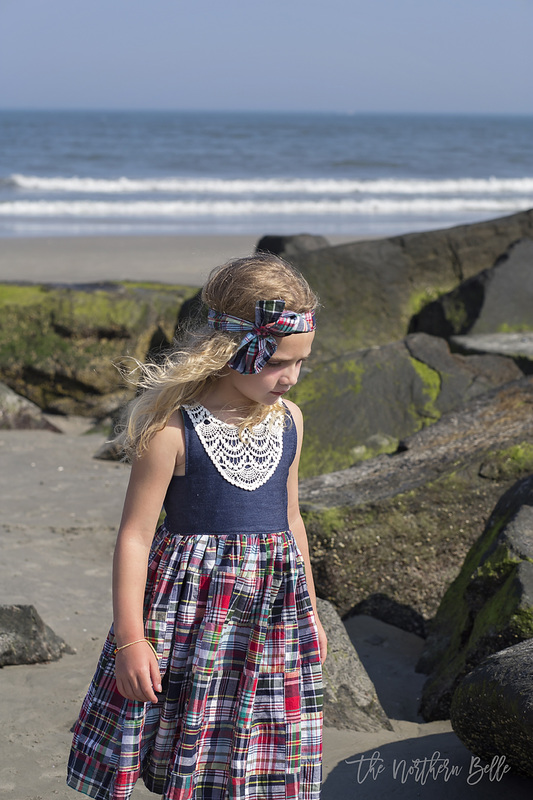
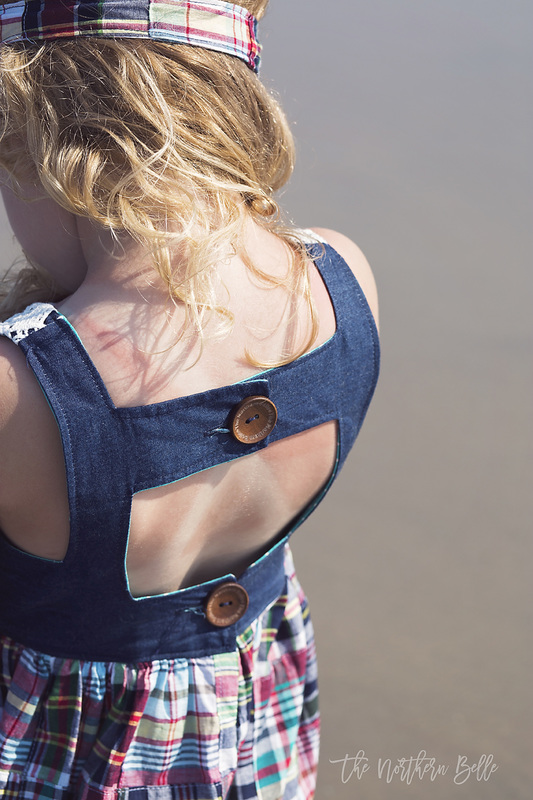
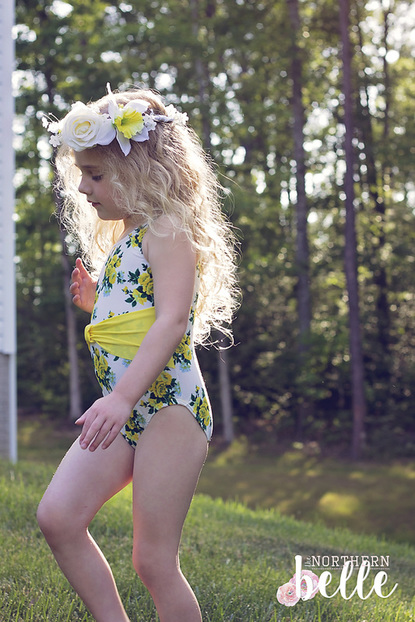
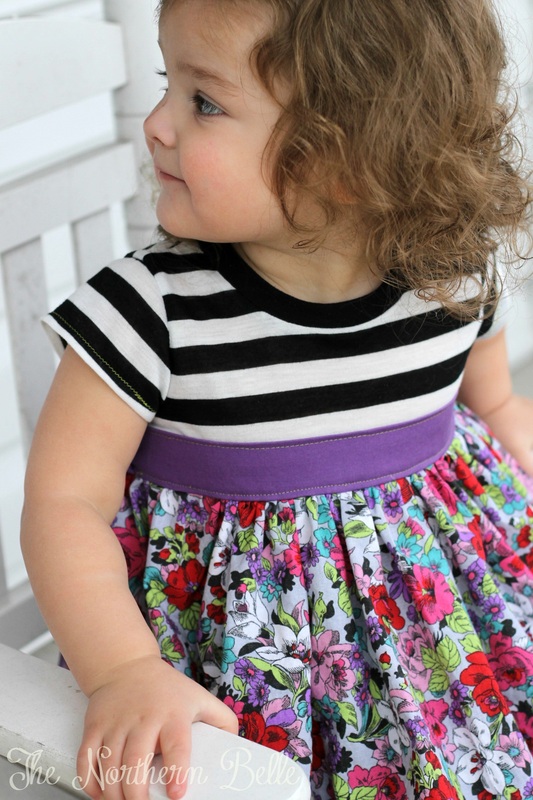
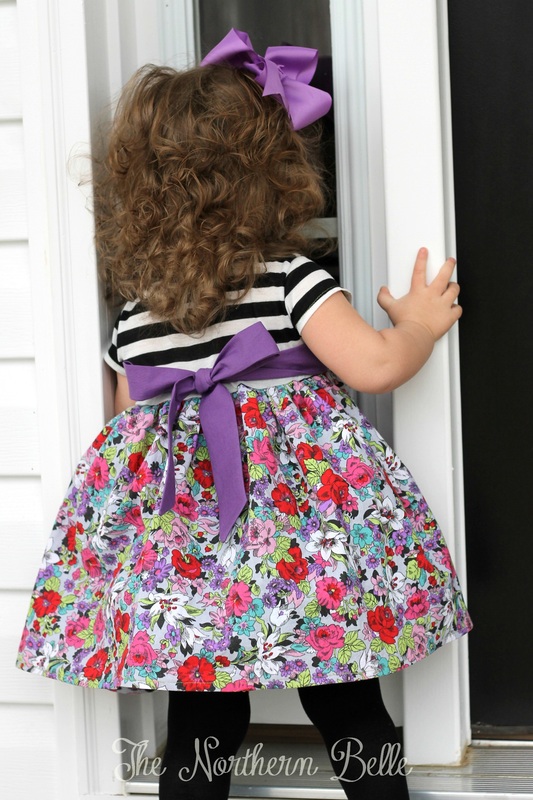
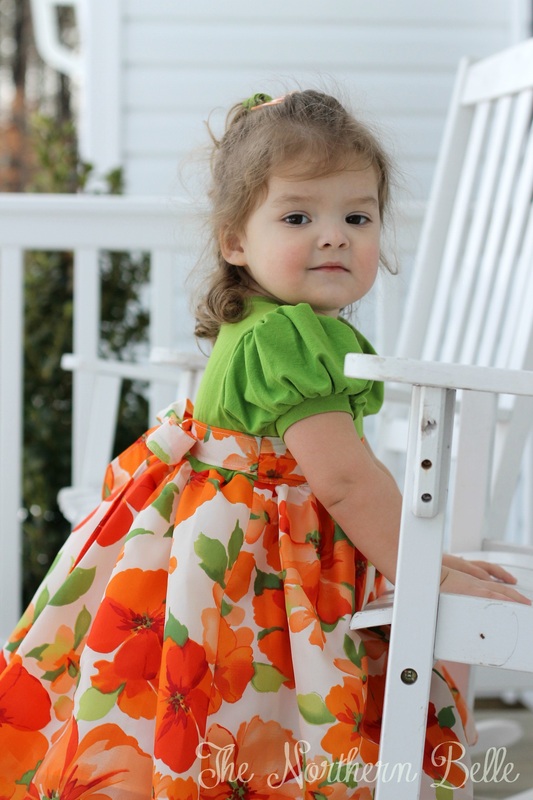
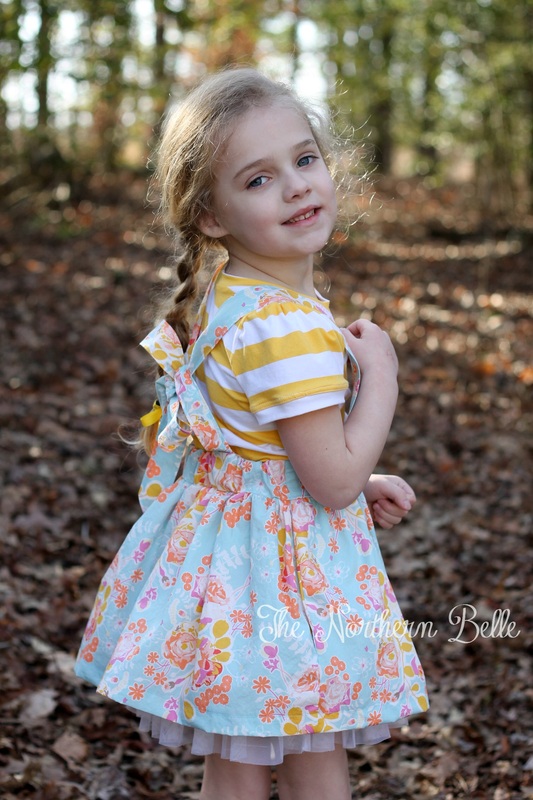
 Wooden buttons from Bethany Lane added the perfect detail to the back bodice!  And let me just say, the back bodice is EVERY-THING!! Kudos to Cassie of LLK for designing such a beautiful dress!
Picture
Picture
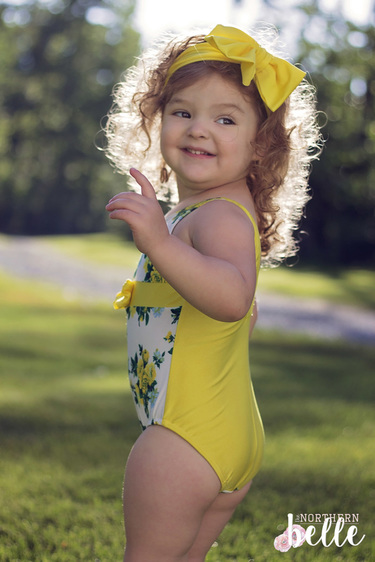
Let's talk about accessories!  The Winnie Pinnie headband is available for FREE when you are a member of the LLK facebook group!  It's a super quick sew--I'm talking 10 minutes from start to finish--and the perfect way to finish off your Winnie look.  The headband also looks great with any of your other handmade or store-bought outfits!
Picture
Thanks for stopping by The Northern Belle!  Don't forget to check out the other stops on the LLK Winnie Pinnie Blog Tour!  There are some beautiful Winnie's sure to inspire you to make your own!

Purchase your copy of Winnie Pinnie here!  Use the code: WPTour for 20% off the pattern through 8/1/2016, midnight EST.
​
Picture

The Winnie Pinnie Blog Tour Calendar

Monday, July 25th- Kick off post with Little Lizard King (Sale Begins)

Tuesday, July 26th- Heather | All Things Katy | and Megan | The Northern Belle |

Wednesday, July 27th- Melissa | Made by Melli | and Jane |Not Sew Plain Jane |

Thursday, July 28th- Sara | Irish Eyes are Sewing | and Kari | Little Lizard King |

Friday, July 29th- Jennifer | Jelly Lou Creations | and Cassie | Two Sweet Peas and Me |

Saturday, July 30th- Dearly Loved Photography | and Valerie | Elegantine |

Monday, August 1- Raedene | Little Lizard King | (End of Sale)

4 Comments

Library Cardi goes to Ballet

9/15/2015

1 Comment

 
Today we're going to take a look at the new Library Cardi from Little Lizard King aka LLK!  Let me tell you, this adorable sweater lives up to the hype!  I'll walk you through my version and give you some info on the pattern!
Picture
My oldest started ballet class last week, and since the mornings have started to cool off, I realized she needed a sweater to wear over her ballet gear!  Library Cardi to the rescue!  I made her a size 5 width, 6 length. (It's so nice being able to customize the fit for my tall, skinny girl!)

The Library Cardi comes in sizes 12 months through 14 and PSSSSSSTTT! Guess what?  Cassie of LLK just released the women's version too!  There's even a bundle pack if you want to get the Mommy & Me versions... how fun??!!!?? 
Picture
It is designed for knit fabrics.  The main body and sleeves are knit, as well as the bindings and cuffs.  A good quality, stretchy knit is recommended for the bindings and cuffs so it does not loose it's shape!  I couldn't agree more!  The solid, burgundy knit I used is from the fabulous Purpleseamstress on Facebook!  Mel's solid knits can't be beat!  The gray floral I used for the main body and sleeves is from Girl Charlee!  It worked well, and has a nice "slouch" factor, but I would have liked it to have a little more stretch (personal preference).

This was a very quick sew.  I finished it in a few hours.  (It always takes me longer because I have so many little interruptions.. by little interruptions, I mean my 3 kiddos) :)  The most time consuming part was creating the bindings.  But even those didn't take long.  I love a quick sew... so gratifying!!!
Picture
Okay... onto my favorite feature of the Library Cardi.... THE POCKETS!  I mean can we just take a second to appreciate the awesomeness going on here?!?! :)  Kids LOVE pockets.  Everyone loves pockets, right?  The front lining makes up the front of the pockets... so it's a great place to choose a contrasting fabric to liven up your cardi!  I didn't have enough coordinating knits, so I decided to use more of my gray floral, since I'm kind of in love with this print.
Picture
I can't talk enough about how thrilled she was with the pockets!  That made this sewing mama's heart soar. :)  I was actually going to make her a ballet bag to carry her shoes and belt, but GUESS WHAT??? I didn't have to because everything fits in these awesome, GIANT pockets!!!
Picture
If you're looking for a cute, stylish, quick, gratifying sew that your child will love, go grab a copy of the Library Cardi from LLK!  I promise you'll love it!  My tiny dancer will be wearing this a lot this Fall and Winter and not just to dance class!  She's going to wear it to school most days with skinny jeans or leggings. 

Library Cardi from Little Lizard King can be purchased here!!!  Special thanks to Cassie for giving me the opportunity to sew up this sweet little sweater! <3
1 Comment

Dive Into Swimsuits~ "Swimsuits & Sprinklers"

5/29/2015

4 Comments

 
Today, is my turn on the Cole's Creations "Dive Into Swimsuits" Blog Tour! I adore Nicole from Cole's Creations and have made lots of her patterns.  Not a bathing suit though... Nope.  I have avoided them ever since I started sewing knits.  When I was presented with the opportunity to test her newest pattern, The Lakehouse, I decided to dive right in.  (Get it? hahaha) Was I scared?  Yep, you bet I was scared.  I'm so glad I decided to go for it though! :) 

We are going to take a look at several Cole's Creations patterns.  Last week I tested the brand-spanking new "Lakehouse" and made a coordinating "Bow-a-licious".  I also whipped up a matching "Lakehouse Swimsuit for Dolly."  

My girls had a blast modeling these suits in our "Swimsuits & Sprinklers" photo shoot.  Poor yourself a glass of lemonade and let's take a look at these patterns.
  Cheers!
Picture
The Lakehouse Swimsuit:
*One-piece suit
*Sizes 1/2 through 16 (That is a HUUUUUUUUGE size range!)
*Can be used as a swimsuit or leotard
*Separate pieces for the front, bottom, and waistband so you can use up to 3 different fabrics on the front... how fun is that?!
*Empire waist
*Sweet bow-detail on waistband
*Difficulty Level- Intermediate
Picture
Here is my youngest daughter in The Lakehouse.  She is a sweet, roly-poly little thing.  None of her sister's hand-me-downs fit her this year.  She typically wears a 3T in ready to wear clothing, but bathing suits just don't fit her right.  They are usually too low cut or bare too much on the sides.  Not to mention, her little tush is always peeking out of store-bought ones.  The Lakehouse however, fit her perfectly!  I was able to measure her and make the corresponding size that fit her just right.  Nothing was hanging out and Little Miss was free to run and play comfortably.
Picture
The Bow-a-licious Swimsuit:
*One-piece suit
*Sizes 1/2 through 16 (Again, huge size range!)
*Can be used as a swimsuit or leotard
*Bow can be on the front or back
*Bow can be reversible if you use a solid fabric
*Difficulty level: Intermediate
Picture
Here is my oldest daughter in the Bow-a-licious.  That is just fun to say!  Bow-a-licious ;)  I have wasted money on 2 store-bought suits already this spring for this girl.  She is tall and thin for her age.  My husband and I were very frustrated with the lack-of-coverage she was getting in the store-bought ones.  I mashed up 3 different sizes to get her the perfect fit and it was SOOOO EASY!  All you have to do is blend the sizes when cutting out your pattern.  For example, she is a size 6 chest, 4 waist, 3 hips, and 6 height.  She was so happy when she tried this on and it fit and covered her in all the right places!  Her only complaint was that it wasn't pink... sigh.  Daddy was especially happy with the level of modesty as well!
Picture
As mentioned before, I have never sewn a swimsuit before this week.  I was scared.  It was so much easier than I expected.  I used my serger for most of the construction and used my conventional sewing machine to stitch the elastics down, in the final steps.  I do not own a coverstitch machine, so that was not an option for me. 

Yes, the fabric is slippery.  That means it takes a little longer to pin and keep everything lined up.  TIP: I actually used wonder clips instead of pins and I was very pleased with how quickly I was able to construct the suit.
Picture
In both patterns, Nicole gives the option of fully lining the front.  I choose to line the front and the back.  I did this for a few reasons.  The first being it is white and light-colored fabric.  I did not want it to be see-through when wet.  Secondly, it gives the suit a nice, clean finish with no seams sticking out and poking you.  I wanted the girls to be comfortable and confident in their suits.  Mission accomplished! :)
Picture
Now that I have made these, I'm not scared anymore.  And you know what?  I don't think I can go back to store-bought bathing suits again.  The customized fit on these is absolute perfection.  And don't forget about the matching patterns for Dolly!  The doll swimsuit patterns are available in 15" and 18" sizes.
Picture
Make sure to check in at the Cole's Corner and Creations Patterns Group on Facebook.  Join in the sew-a-long and enter daily for chances to win some amazing prizes from these fabulous designers! 
Picture
Follow the rest of these talented bloggers and designers as they show-off more awesome swimsuit patterns!
Picture
So that's it!  See?  There's no reason to be scared.  It's time to dive on in and make a bathing suit, or 2, or 3!  Happy sewing... and swimming! :)
4 Comments

Buckskin Princess Dress for Dolly by Cole's Creations

5/7/2015

0 Comments

 
Picture
When Nicole from Cole's Creations asked for pattern testers for the Buckskin Princess Dress for Dolly, I jumped at the chance!  Being part Native American myself, Seneca to be exact :), I encourage my girls to learn about their heritage.  This doll dress gives them the opportunity to play and learn simultaneously.  Fun and educational... DOUBLE BONUS!

What you get with the pattern:
~Available in doll sizes 15" and 18"
~25-page tutorial with colored photographs
~Tips and Tricks
~Tester photos for inspiration
~Optional headband and pattern for moccasins
Picture
I choose to make a very basic dress for my daughter's doll.  I used the main pattern piece and then made my own fringe trim for the neck and side seams.  It was very easy to do.  Just cut a piece of fabric to the desired length and width.  Cut straight lines in your trim, leaving about 1/2" untrimmed.  Boom. There you go! Trim that matches your dress and looks authentic!  I stitched the trim onto the neck and for the side seams, I sandwiched the trim between the front and back dress pieces.  I used a small piece of leather cord to make a belt. 

The great thing about this pattern is you can add as much or as little as you want.  You can make your dress as authentic as you like, customizing it for a particular tribe's dress or regalia. 
Picture
So, there you have it!  The Buckskin Princess Dress for Dolly.  You can purchase your pattern here from the wonderful, Cole's Creations!  Happy sewing!
0 Comments

Have Courage & Be Kind~ Cinderella Inspired Ball Gown

4/27/2015

1 Comment

 
Picture
When Megan from Made for Mermaids mentioned she was offering a FREE Size 5 Cinderella dress from the new movie I could hardly contain my excitement.  With the new Disney live-action film being released at the end of the week, I had a few days to sew up this dreamy ball gown for my daughter.

I used matte satin for the bodice and skirt and layers upon layers of cornflower blue tulle for the sash and overskirt. I think I used 8 layers for the skirt!  I made the butterflies with metallic thread on tulle with my embroidery machine.  Talk about a labor of love!  It took me a whole day (with interruptions from the kiddos) to make those butterflies... NO JOKE!  But it was well worth it to see my little one's expression when she saw the finished dress!!!!!
Picture
In the tutorial, Megan gives great instruction on working with tulle.  This was super helpful to me since I have never made a dress quite this full and fancy. 

I opted to use a Velcro closure in the back instead of a zipper, mostly because I forgot to buy one... oops! 
Picture
We got lots of "Ooooohs and Ahhhhhs" from all the movie-goers on opening weekend which is always fun to get after a project like this that you put so much love into. :)
Picture
If you are lucky to have a size 5 to sew for, I definitely recommend this FREE pattern and tutorial found here from Made for Mermaids.  Just change the colors up and you can use this fabulous pattern for any princess! Pink, you have Aurora.  Yellow, you have Belle! 

I'll leave you with my favorite quote from the new movie...
"Have Courage & Be Kind..." ~ Cinderella 2015
Happy Sewing!
1 Comment

The Avonlea Dress by Cole's Creations

2/24/2015

3 Comments

 
Picture
This past week has been a busy one for PDF Pattern testing around here!  I tested the super cute Avonlea Dress from Cole's Creations.  The dress is inspired by 'Anne of Green Gables'.  The options on this one are endless... you could make a different dress every day and they would all look different!  So many looks = more bang for your buck!  Love that about a pattern!!!!  Check out all these options...

SLEEVE OPTIONS
-Short sleeves
-Long sleeves
-Cap sleeves
-Short Puffed Sleeves
-Long Puffed Sleeves

SKIRT OPTIONS
-Plain skirt
-Ruffled skirt
-Everyday/Cotton fabric
-Fancy/Special occasion fabric

SASH OPTIONS
-Flat
-Ruched

NECKLINE
-Neck band
-Binding

Here's what you get with the pattern:
-33-page tutorial with colored photographs
-1/2 through 16 Size Range
-Many helpful tips and tester photos for inspiration
-Pattern pieces at end of tutorial

For my first version, I opted for the cap sleeve, flat sash, neck band, and plain skirt.  I layered a tutu underneath for extra poof.  Black & white fabric from Hobby Lobby's fall collection and floral is from Joann Fabrics.  I made a size 3.  Dress is meant to hit above knee, but there is instruction in the pattern for lengthening the dress, should you want it longer.
Picture
I thought this one came out just precious!   I love how this version is great for everyday wear for Miss Evie.  She couldn't stop twirling in this dress, which made me so happy.  I know she appreciates something special made just for her!
Picture
Picture
Now, on to version 2, the show-stopping, Fancy version!  I made a size 3 again.  This time, I opted for the puffed short sleeves, ruched sash, neck band and plain skirt using special occasion fabric.  I actually upcycled this whole dress.  The green top is made from a maternity shirt (Old Navy) that was in good shape (hard to believe after 3 pregnancies).  The skirt is made from a bridesmaids dress (David's Bridal)one that I will probably never fit into again... so I grabbed my scissors and started cutting!
Picture
My little one wasn't in the mood for much modeling, but here are a few shots of this version.  I put two tutus under it to really poof it out.  I love this one so much!  This will be her Easter dress. I'm just sad that I don't have enough for a coordinating dress for big sister. :)
Picture
Picture
This pattern is so versatile!  It really is a great addition to your collection.  Here is the craftsy link where you can purchase:  http://www.craftsy.com/pattern/sewing/clothing/avonlea-dress/133138.  There is a matching Dolly dress pattern available as well!  Happy sewing!
3 Comments

PDF Pattern Review M4M Samantha & Charlotte

2/16/2015

2 Comments

 
This is my first ever blog post... how exciting!!!  Welcome to The Northern Belle!  (That's what I've been calling myself in the sewing world.)  It's my name for my imaginary sewing business and what I watermark all my photos with when I share them online. :)

Today I will be reviewing one of my favorite PDF pattern designers, Made for Mermaids and her 2 newest patterns.  I was super-duper lucky to be a tester for both of these patterns last week:  The Samantha Suspender Skirt and the Charlotte Collar Top!

Picture
I tested a size 5 for my oldest daughter, Sophia and then made a bonus skirt in a size 3 for my middle child, Evelyn, affectionately called Evie.  All of Megan's patterns for Made for Mermaids (M4M) are beautifully designed and written with great detail that a beginner seamstress, or sewist (<--- what the kids are calling them these days) can follow!

Let's start with the Samantha Suspender Skirt...
-Sizes 1/2 through 14
-Vintage length skirt
-Optional pockets
-Flat front skirt option
-Faux-button placket option
-Suspenders are optional
-One pattern piece (pocket)
-Instruction on how to tie the suspenders

You get a 20-page tutorial with detailed, colored photographs to guide you through the sewing process.  The pattern has one pattern piece included at the end of the tutorial!  JUST ONE!

Picture
The skirt is meant to hit above the knee, as it is a vintage length.  I layered with an old tutu from Target for some extra poof, because that is how we roll around here! ;)  The suspenders tie in the back to form a precious bow.  I tested the faux-button placket version and added big 'ole wooden buttons and pockets.  I love this skirt so much and I've decided it is going to be Sophia's spring picture outfit for school!
Picture
I always feel guilty when I make stuff for my big girl and not my baby girl... so I whipped up a quick skirt for Miss Evie.  I made the most basic skirt possible.  No suspenders, no pockets, no buttons, flat front.  It was soooooooooo quick to make this way.  I embroidered an old hand-me-down t-shirt to pair with it and I just love how this outfit turned out.  My little Cookie Monster approves as well!
Picture
Now on to the Charlotte Collar Top...
-Sizes 1/2 through 14
-Curved collar option
-Straight collar option
Picture
You get a 12-page tutorial with pattern pieces at the end.  Colored photographs guide you step-by-step through the construction of this top.  It is a knit bodice with a woven collar.  I opted to make the straight collar and I added a lace overlay.  Megan gives great detail and lots of helpful hints (if you are new to sewing with knits).  It is simple to construct on your serger or your conventional sewing machine.  This top looks so sweet and pairs perfectly with the Samantha skirt.  I can't wait to make more of these patterns for the spring and summer!  You can buy the patterns separately or bundled together at www.madeformermaids.com.

If you have never used any Made for Mermaids patterns... RUN, DON'T WALK, to www.madeformermaids.com!  Her patterns are wonderfully written, easy to follow and always turn out like a dream.  Every time I finish a pattern (and I have almost all of them, BTW), I think, "Wow! I can't believe I made this myself!!!!"  You won't be disappointed... I PROMISE!

Whew!  That was fun!  I hope you enjoyed reading about these two really CUUUUUUUUUUTE patterns from M4M.  Thanks for stopping by!
2 Comments
    Picture

    Hi, I'm Megan!

    Wife and mommy of 2 little Belles-in-Training and a brand new baby boy!  I'm a Pennsylvania native and a Southern Belle wannabe.  I love crafting, sewing, art, design and home decorating!  I hope you enjoy following my journey in creating and crafting beautiful things for the people I love!

    Archives

    July 2016
    September 2015
    May 2015
    April 2015
    February 2015

    Categories

    All

    RSS Feed

Powered by Create your own unique website with customizable templates.